White-Label Site Plan Workflow for Contractors (2026)
A white-label site plan workflow lets contractors deliver professional, permit-ready drawings under their own brand without hiring a draftsman. This guide walks you through every step of building that system, from client intake to permit submission, so your business runs smoother and scales faster.
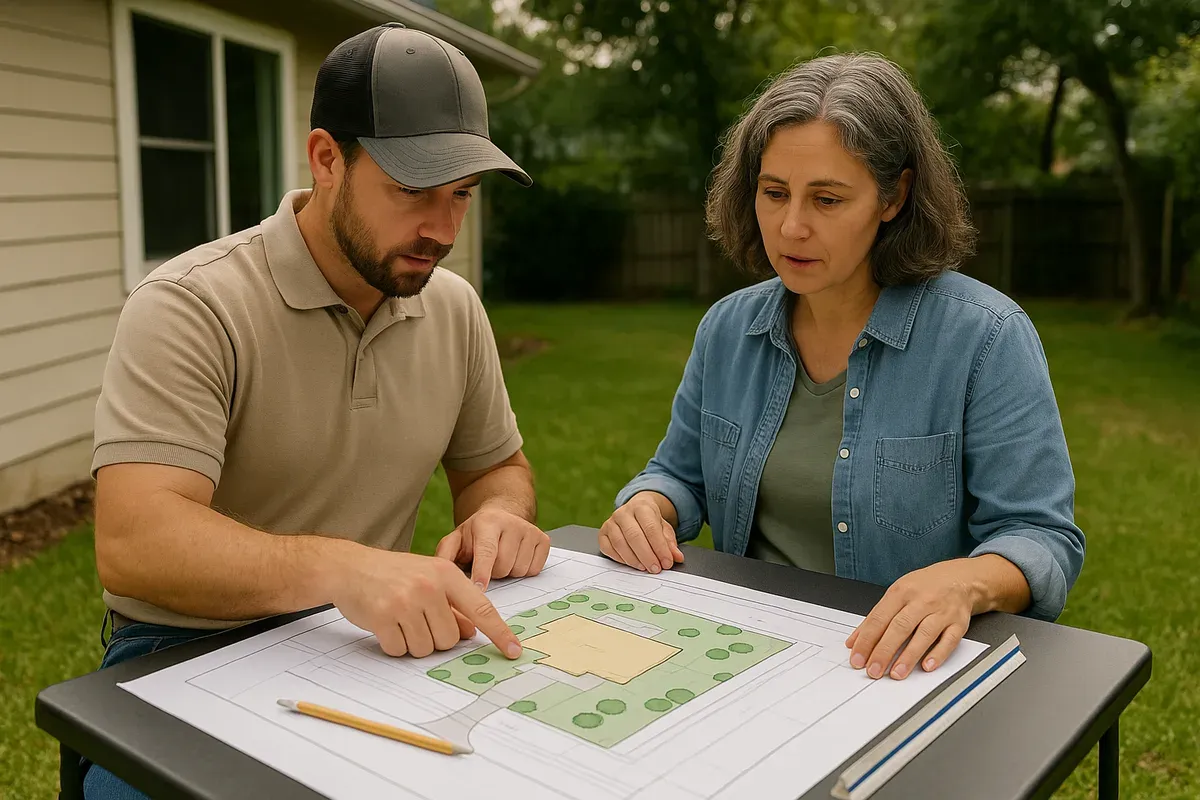
<h2>Why Your Contracting Business Needs a Site Plan Workflow in 2026</h2>
<p>If you have ever lost a job because your permit application was delayed, or spent three weeks chasing a drafter for a simple plot plan, you already understand the problem. Site plans are a bottleneck for most contracting businesses, and that bottleneck costs real money.</p>
<p>Here is the good news: building a repeatable, branded site plan workflow is no longer reserved for large GC firms with in-house CAD teams. In 2026, browser-based tools like <a href="/">Site Plan Creator</a> make it possible for any contractor, whether you run a two-person deck crew or a mid-size renovation company, to produce permit-ready property site plans quickly, consistently, and under your own brand.</p>
<p>This article walks you through exactly how to build that workflow from the ground up. You will learn how to systematize client intake, create drawings that meet permit office expectations, brand your deliverables, and integrate site plan production into your broader business operations. The result is a contracting business that looks more professional, closes more jobs, and moves through the permit process faster than your competitors.</p>
<hr>
<h2>What Is a White-Label Site Plan Workflow?</h2>
<p>Before diving into the how-to, it is worth being precise about what we mean by a <strong>white-label site plan workflow</strong>.</p>
<p>A white-label workflow has two components:</p>
<ol>
<li><strong>The workflow itself:</strong> A repeatable, documented process for gathering property information, producing a site plan drawing, reviewing it for permit compliance, and delivering it to the client or permit office.</li>
<li><strong>The white-label layer:</strong> Every deliverable, from the PDF site plan to the cover sheet to the email template you use to send it, carries your company's branding rather than the name of whatever tool or subcontractor produced it.</li>
</ol>
<p>When a homeowner receives a professionally branded site plan from your company, they perceive you as a full-service contractor who handles everything. That perception builds trust, reduces friction, and makes it easier for them to say yes to your proposal.</p>
<p>The permit workflow for <a href="/contractors">contractors</a> that includes in-house site plan production also reduces your dependency on third parties. You are not waiting on a surveyor to produce a simple plot plan, and you are not paying a drafting service $300 per drawing for something you can produce yourself in 30 minutes.</p>
<hr>
<h2>Step 1: Audit Your Current Site Plan Process</h2>
<p>Before you build a new system, you need to understand what you are currently doing and where it breaks down.</p>
<h3>Common Pain Points in Contractor Site Plan Workflows</h3>
<ul>
<li>Waiting days or weeks for a third-party drafter to return a drawing</li>
<li>Receiving drawings that do not match local permit office requirements</li>
<li>Paying per-drawing fees that eat into project margins</li>
<li>Sending clients generic, unbranded PDFs that undermine your professional image</li>
<li>Losing track of which version of a site plan was submitted to which permit office</li>
<li>Restarting the drawing process every time a project detail changes</li>
</ul>
<p>Take 30 minutes to map your current process on paper. Write down every step from the moment a client signs a contract to the moment a permit is issued. Note who is responsible for each step, how long it typically takes, and where delays most often occur.</p>
<p>This audit gives you a baseline. When you implement your new workflow, you will be able to measure exactly how much time and money you are saving.</p>
<hr>
<h2>Step 2: Understand What Permit Offices Actually Need</h2>
<p>One of the most common reasons contractors waste time in the permit process is submitting site plans that are incomplete or non-compliant. Every revision request from a building department adds days to your timeline.</p>
<h3>Core Elements Most Permit Offices Require</h3>
<p>While requirements vary by jurisdiction, most building departments expect a site plan to include:</p>
<ul>
<li><strong>Property boundaries</strong> with accurate dimensions</li>
<li><strong>North arrow</strong> and scale indicator</li>
<li><strong>Existing structures</strong> shown as building footprints with dimensions</li>
<li><strong>Proposed structures</strong> or additions, clearly differentiated from existing</li>
<li><strong>Setback dimensions</strong> from all property lines to structures</li>
<li><strong>Easements and rights-of-way</strong> if applicable</li>
<li><strong>Driveway and access points</strong></li>
<li><strong>Utilities</strong> (water, sewer, electrical service entry) where required</li>
<li><strong>Flood zone notation</strong> if the property falls within a FEMA-designated area</li>
</ul>
<p>For flood zone properties, always cross-reference the <a href="https://msc.fema.gov/portal/home" rel="nofollow noopener" target="_blank">FEMA Flood Map Service Center</a> before finalizing a site plan. Submitting a plan without proper flood zone notation in a regulated area is one of the fastest ways to trigger a rejection.</p>
<p>The <a href="https://www.iccsafe.org/codes-tech-support/codes/" rel="nofollow noopener" target="_blank">International Code Council's building code resources</a> are also an excellent reference for understanding what site documentation is required at different stages of a permit application.</p>
<h3>Research Local Requirements Before You Build Your Template</h3>
<p>Call your three most common permit offices and ask specifically:</p>
<ol>
<li>What scale is required or preferred for site plans?</li>
<li>Do you accept digital PDF submissions, or do you require printed copies?</li>
<li>Are there specific title block requirements (contractor license number, property address, parcel number)?</li>
<li>What setback dimensions are required for the project types you most commonly permit?</li>
</ol>
<p>Document these answers in a simple spreadsheet organized by jurisdiction. This becomes a reference document your entire team can use.</p>
<hr>
<h2>Step 3: Choose the Right Tool for Your Workflow</h2>
<p>The tool you use to produce site plans is the engine of your workflow. It needs to be fast, accurate, easy for non-drafters to use, and capable of producing output that meets permit office standards.</p>
<h3>What to Look for in a Contractor Site Plan Tool</h3>
<ul>
<li><strong>Browser-based access:</strong> No software installation means your whole team can use it from any device.</li>
<li><strong>Pre-built symbols and elements:</strong> Doors, windows, trees, driveways, utility markers, and other standard site plan elements should be available out of the box.</li>
<li><strong>Accurate scaling:</strong> The tool must produce drawings at real-world scale, not just approximate layouts.</li>
<li><strong>PDF export:</strong> Permit offices universally accept PDF. Your tool must export clean, high-resolution PDFs.</li>
<li><strong>Custom branding:</strong> The ability to add your company logo, name, and license number to the title block is non-negotiable for a white-label workflow.</li>
<li><strong>Property boundary tools:</strong> Drawing and dimensioning property lines accurately is the foundation of any compliant site plan.</li>
</ul>
<p>Site Plan Creator was built specifically for this use case. It is a professional browser-based CAD-style application that lets contractors produce permit-ready site plans without CAD training. The platform includes all the elements listed above, and it is designed around the real-world needs of permit submissions rather than architectural design.</p>
<hr>
<h2>Step 4: Build Your Branded Site Plan Template</h2>
<p>This is where the white-label component becomes tangible. A branded template is a pre-configured site plan file that includes your company's title block, standard notations, and formatting, so every drawing you produce looks like it came from a professional firm.</p>
<h3>What Your Title Block Should Include</h3>
<p>A title block is the information panel, typically in the lower right or lower left corner of the drawing, that identifies the project and the preparer. For a contractor's white-label site plan, include:</p>
<ul>
<li>Company name and logo</li>
<li>Company address and phone number</li>
<li>Contractor license number (required in most jurisdictions)</li>
<li>Project address and parcel number</li>
<li>Client name</li>
<li>Drawing date and revision date</li>
<li>Scale</li>
<li>Drawing title (e.g., "Site Plan – Proposed Deck Addition")</li>
<li>Sheet number</li>
</ul>
<h3>Standard Notations to Include in Your Template</h3>
<p>Beyond the title block, your template should include pre-written standard notations that appear on every drawing:</p>
<ul>
<li>"All dimensions are in feet and inches unless otherwise noted."</li>
<li>"Contractor to verify all existing conditions prior to construction."</li>
<li>"This drawing is for permit purposes only and is not a boundary survey."</li>
<li>North arrow placeholder</li>
<li>Scale bar</li>
</ul>
<p>These notations protect you legally and signal to plan checkers that you know what you are doing.</p>
<h3>Save Multiple Template Variants</h3>
<p>If you work in multiple jurisdictions or across multiple project types, create a separate template for each common scenario:</p>
<ul>
<li>Residential deck addition</li>
<li><a href="/adu-feasibility-software">Accessory dwelling unit</a> (ADU) site plan</li>
<li>Pool and spa installation</li>
<li>Detached garage or shed</li>
<li>Commercial tenant improvement</li>
</ul>
<p>Having a pre-configured template for each project type means your team can open the right starting file and begin entering project-specific information immediately, rather than rebuilding the layout from scratch each time.</p>
<hr>
<h2>Step 5: Systematize Your Client Intake Process</h2>
<p>A smooth contractor site plan workflow depends on getting accurate information from the client at the start of the project. If you are chasing down property dimensions or parcel numbers after the fact, you are wasting time and introducing errors.</p>
<h3>Create a Site Plan Information Intake Form</h3>
<p>Build a simple intake form that every client completes before you begin drawing. Include fields for:</p>
<ul>
<li>Property address</li>
<li>Assessor's parcel number (APN)</li>
<li>Lot dimensions (if known)</li>
<li>Existing structure dimensions and locations</li>
<li>Proposed project description and dimensions</li>
<li><a href="/setback-guide">Setback requirements</a> (if the client has already researched this)</li>
<li>HOA restrictions (if applicable)</li>
<li>Utility locations (if known)</li>
<li>Any existing surveys or drawings the client can provide</li>
</ul>
<p>This form can be a PDF, a Google Form, or a field in your CRM. The format matters less than the habit of collecting this information consistently.</p>
<h3>Use Publicly Available Resources to Fill in Gaps</h3>
<p>Clients often do not know their property dimensions or APN. Train your team to use these free resources to fill in missing information:</p>
<ul>
<li><strong>County assessor websites:</strong> Most counties publish parcel maps and property dimensions online.</li>
<li><strong>Google Maps satellite view:</strong> Useful for understanding site layout and approximate dimensions (always verify with actual measurements).</li>
<li><strong>Local GIS portals:</strong> Many municipalities publish interactive GIS maps with property boundaries, zoning, and setback overlays.</li>
<li><strong>FEMA Flood Map Service Center:</strong> To determine flood zone designation before beginning the drawing.</li>
</ul>
<hr>
<h2>Step 6: Define Roles and Responsibilities Within Your Team</h2>
<p>A workflow only works if everyone knows their role. Even if you are a solo contractor right now, document the workflow as if you will eventually have a team executing it. This documentation becomes a training resource as you grow.</p>
<h3>A Simple Role Structure for Site Plan Production</h3>
<p><strong>Project Manager / Estimator:</strong></p>
<ul>
<li>Collects site plan intake information from the client</li>
<li>Confirms permit requirements with the local building department</li>
<li>Initiates the site plan drawing request</li>
</ul>
<p><strong>Site Plan Producer (could be you, an office manager, or a trained field supervisor):</strong></p>
<ul>
<li>Opens the appropriate branded template in Site Plan Creator</li>
<li>Enters all property and project-specific information</li>
<li>Produces the draft drawing</li>
<li>Runs a compliance checklist before finalizing</li>
</ul>
<p><strong>Reviewer:</strong></p>
<ul>
<li>Checks the drawing against the permit office requirements for that jurisdiction</li>
<li>Verifies setback dimensions, building footprints, and property boundaries</li>
<li>Approves the drawing for submission or sends it back for revision</li>
</ul>
<p><strong>Permit Submitter:</strong></p>
<ul>
<li>Exports the final PDF from Site Plan Creator</li>
<li>Compiles the full permit application package</li>
<li>Submits to the permit office (online or in person)</li>
<li>Tracks application status and responds to any correction requests</li>
</ul>
<p>For small contractors, one person may fill multiple roles. That is fine. The point is that each responsibility is clearly assigned and documented.</p>
<hr>
<h2>Step 7: Build a Quality Control Checklist</h2>
<p>Every site plan that leaves your office should pass through a quality control checklist before submission. This is one of the highest-leverage steps in the entire workflow because a single revision request from a permit office can cost you a week.</p>
<h3>Site Plan QC Checklist</h3>
<p>Before submitting any site plan, verify the following:</p>
<p><strong>Property Information</strong></p>
<ul>
<li><input disabled="" type="checkbox"> Correct property address on title block</li>
<li><input disabled="" type="checkbox"> Correct APN on title block</li>
<li><input disabled="" type="checkbox"> Property boundaries drawn and dimensioned accurately</li>
<li><input disabled="" type="checkbox"> North arrow included and oriented correctly</li>
</ul>
<p><strong>Structures and Dimensions</strong></p>
<ul>
<li><input disabled="" type="checkbox"> All existing structures shown with correct footprint dimensions</li>
<li><input disabled="" type="checkbox"> Proposed structure shown and clearly labeled</li>
<li><input disabled="" type="checkbox"> All setback dimensions shown from structures to property lines</li>
<li><input disabled="" type="checkbox"> Setback dimensions comply with local zoning requirements</li>
</ul>
<p><strong>Drawing Standards</strong></p>
<ul>
<li><input disabled="" type="checkbox"> Drawing is at the correct scale for this jurisdiction</li>
<li><input disabled="" type="checkbox"> Scale bar is included and accurate</li>
<li><input disabled="" type="checkbox"> All text is legible at the print size</li>
<li><input disabled="" type="checkbox"> Company branding and license number appear in title block</li>
</ul>
<p><strong>Special Conditions</strong></p>
<ul>
<li><input disabled="" type="checkbox"> Flood zone notation included if applicable</li>
<li><input disabled="" type="checkbox"> Easements shown if applicable</li>
<li><input disabled="" type="checkbox"> Utility locations shown if required by this jurisdiction</li>
</ul>
<p>Print this checklist and keep a physical or digital copy in each project file. When a permit is approved without revisions, it is often because someone ran this checklist carefully.</p>
<hr>
<h2>Step 8: Integrate Site Plans Into Your Broader Business Systems</h2>
<p>A white-label site plan workflow does not exist in isolation. It needs to connect to your estimating process, your project management system, and your client communication workflow.</p>
<h3>Connecting Site Plans to Your Estimating Process</h3>
<p>Many contractors do not realize that producing a site plan early in the sales process can actually help close the deal. When you present a client with a professionally branded site plan alongside your proposal, it demonstrates competence and attention to detail that most competitors cannot match.</p>
<p>Consider offering a site plan as part of your proposal package for larger projects. The cost to produce it using Site Plan Creator is minimal, and the perceived value to the client is significant.</p>
<h3>Connecting Site Plans to Project Management</h3>
<p>Store every site plan in your project management system with a clear naming convention:</p>
<p><code>[ClientLastName]_[ProjectAddress]_[ProjectType]_[Version]_[Date].pdf</code></p>
<p>Example: <code>Martinez_1842OakSt_DeckAddition_v2_20260315.pdf</code></p>
<p>This naming convention makes it easy to find the correct version of any drawing and to track revision history.</p>
<h3>Automating Client Delivery</h3>
<p>Create an email template for delivering completed site plans to clients. The template should:</p>
<ul>
<li>Thank the client for their patience</li>
<li>Briefly explain what the site plan shows and why it is important for the permit</li>
<li>Attach the branded PDF</li>
<li>Outline the next steps in the permit process</li>
<li>Include your company contact information</li>
</ul>
<p>This professional delivery reinforces your brand and keeps the client informed, which reduces the number of "where are we?" calls you receive.</p>
<hr>
<h2>Step 9: Train Your Team and Document Everything</h2>
<p>The difference between a workflow and a one-time process is documentation. If the only person who knows how to produce a site plan in your business is you, you have a single point of failure.</p>
<h3>Create a Site Plan Production SOP</h3>
<p>Write a Standard Operating Procedure (SOP) that walks a new team member through the entire site plan production process step by step. Include:</p>
<ul>
<li>How to open and use Site Plan Creator</li>
<li>Which template to use for each project type</li>
<li>How to enter property boundary information</li>
<li>How to draw and dimension existing and proposed structures</li>
<li>How to show setbacks</li>
<li>How to complete the title block</li>
<li>How to run the QC checklist</li>
<li>How to export and name the final PDF</li>
</ul>
<p>Record a screen-capture video walkthrough of the process and store it alongside the written SOP. New team members can watch the video and refer to the written document as they practice.</p>
<h3>Schedule Regular Workflow Reviews</h3>
<p>Plan a quarterly review of your site plan workflow. Ask:</p>
<ul>
<li>Are we consistently getting permits approved on first submission?</li>
<li>Have any permit offices changed their requirements?</li>
<li>Are there project types we are doing more frequently that need a new template?</li>
<li>Is there any step in the workflow that is taking longer than it should?</li>
</ul>
<p>The <a href="https://www.planning.org/" rel="nofollow noopener" target="_blank">American Planning Association</a> publishes regular updates on zoning and land use policy that can affect permit requirements. Subscribing to their resources is a low-effort way to stay ahead of regulatory changes.</p>
<hr>
<h2>The Business Case: What a Streamlined Permit Workflow for Contractors Is Worth</h2>
<p>Let us put some numbers around this. Consider a mid-size remodeling contractor who pulls 40 permits per year.</p>
<ul>
<li><strong>Current cost of third-party drafting:</strong> $250 per drawing x 40 = $10,000 per year</li>
<li><strong>Average delay per project due to site plan bottleneck:</strong> 5 business days</li>
<li><strong>Total delay per year:</strong> 200 business days</li>
<li><strong>Cost of delay (lost productivity, delayed payment):</strong> Conservatively $500 per day = $100,000 in delayed cash flow</li>
</ul>
<p>With an in-house white-label site plan workflow using Site Plan Creator:</p>
<ul>
<li><strong>Tool cost:</strong> A fraction of the third-party drafting budget</li>
<li><strong>Time to produce a site plan:</strong> 30–60 minutes per drawing</li>
<li><strong>Permit submission delays:</strong> Dramatically reduced through standardized QC</li>
<li><strong>Client perception:</strong> Elevated by professional, branded deliverables</li>
</ul>
<p>The return on investment is not marginal. For most contractors, building this workflow is one of the highest-leverage operational improvements they can make in 2026.</p>
<hr>
<h2>Scaling Your White-Label Workflow as Your Business Grows</h2>
<p>Once your workflow is running smoothly, you have options for scaling it.</p>
<h3>Option 1: Offer Site Plans as a Standalone Service</h3>
<p>Some contractors find that their site plan production capability becomes a revenue stream in itself. Other local contractors, handymen, or <a href="/homeowners">homeowners</a> who need a simple plot plan for a permit are potential clients. Charging $150–$300 for a site plan you can produce in under an hour is a profitable service line.</p>
<h3>Option 2: Use Site Plans as a Sales Tool</h3>
<p>Train your sales team to offer a preliminary site plan as part of the consultation process for larger projects. A branded site plan presented at the proposal meeting signals that your company is organized, professional, and ready to move. It differentiates you from competitors who show up with a handwritten sketch.</p>
<h3>Option 3: Build a Template Library for Every Jurisdiction You Work In</h3>
<p>As you expand your service area, build jurisdiction-specific template variants that pre-populate the title block with the correct formatting and notations for each permit office. Over time, this library becomes a competitive asset that makes your team faster and more accurate than any competitor who is still starting from scratch on every drawing.</p>
<hr>
<h2>Conclusion: Your Competitive Advantage Starts With Better Systems</h2>
<p>The contracting businesses that will grow the fastest in 2026 are not necessarily the ones with the best crews or the lowest prices. They are the ones with the best systems. A white-label site plan workflow is one of those systems: it makes you faster, more professional, and less dependent on third parties at a critical stage of every project.</p>
<p>Building this workflow is not complicated, but it does require intentionality. You need to audit your current process, understand what permit offices actually need, choose the right tool, build branded templates, systematize your intake, define team roles, implement quality control, and document everything.</p>
<p>Site Plan Creator is designed to be the engine of exactly this kind of workflow. It is a professional, browser-based CAD-style application built specifically for permit-ready property site plans. You can produce drawings that include accurate property boundaries, building footprints, setback dimensions, and all the elements permit offices expect, branded with your company's logo and license number, in a fraction of the time it would take to work with a third-party drafter.</p>
<p>If you are ready to stop letting site plans slow down your business, visit <a href="https://www.siteplancreator.com">siteplancreator.com</a> and start building your workflow today. Your next permit approval, and the client confidence that comes with it, is closer than you think.</p>