Retaining Wall Permits: A Landscaper's Complete Guide
Retaining wall permits don't have to cost you a job or a client relationship. This guide walks landscapers through every step of the permit process, from understanding height thresholds to submitting a professional site plan that gets approved the first time.
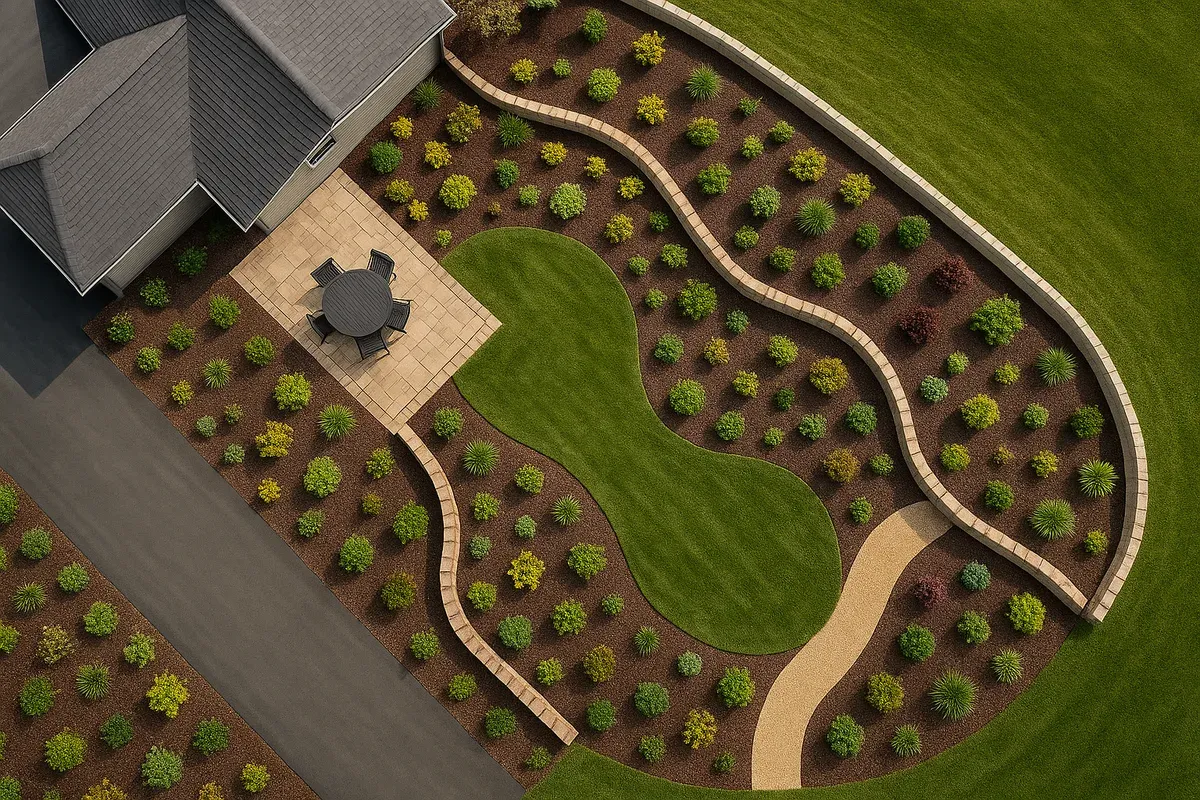
<h2>Why Retaining Wall Permits Trip Up Even Experienced Landscapers</h2>
<p>You've done dozens of <a href="/retaining-wall-site-plans">retaining walls</a>. You know how to read a slope, pick the right block, and build something that will last twenty years. But the moment a client asks "do we need a permit for this?" the conversation gets uncomfortable fast.</p>
<p>Permit requirements for retaining walls are one of the most misunderstood areas in residential landscaping. Some jurisdictions require permits for walls over 24 inches. Others set the threshold at 36 or 48 inches. A few municipalities require permits for any wall that also acts as a surcharge-bearing structure, regardless of height. Get it wrong in either direction and you're looking at stop-work orders, fines, or a client who blames you for a project that's now frozen.</p>
<p>The good news is that landscapers who understand the permit process don't lose jobs over it. They win jobs because of it. Clients want a contractor who can navigate complexity without drama. This guide will walk you through exactly how to handle retaining wall permits professionally, efficiently, and in a way that actually strengthens your client relationships instead of straining them.</p>
<hr>
<h2>Understanding When a Retaining Wall Permit Is Actually Required</h2>
<p>Before you can advise your client, you need to understand the triggers that make a retaining wall permit necessary. These vary significantly by jurisdiction, but there are common patterns you can rely on as a starting framework.</p>
<h3>Height Thresholds: The Most Common Trigger</h3>
<p>The majority of local building departments use wall height as the primary permit trigger. The most common thresholds you'll encounter are:</p>
<ul>
<li><strong>24 inches (2 feet):</strong> Some municipalities, particularly in California and the Pacific Northwest, require permits for walls over 24 inches measured from the bottom of the footing to the top of the wall.</li>
<li><strong>36 inches (3 feet):</strong> A common threshold in many Midwestern and Southeastern jurisdictions.</li>
<li><strong>48 inches (4 feet):</strong> The threshold referenced in many model building codes, including standards derived from the <a href="https://www.iccsafe.org/products-and-events/i-codes/ibc/" rel="nofollow noopener" target="_blank">International Building Code published by the ICC</a>.</li>
</ul>
<p>The critical detail most landscapers miss: height is typically measured from the bottom of the footing, not from the finished grade on the low side. A wall that looks like 30 inches above grade could easily be 48 inches from footing to top once you account for buried depth.</p>
<h3>Surcharge and Structural Conditions</h3>
<p>Even a short wall may require a permit if it:</p>
<ul>
<li>Supports a structure (fence, deck, or building foundation)</li>
<li>Is located near a property line where failure could affect neighboring property</li>
<li>Retains soil that supports a driveway, parking area, or road</li>
<li>Is part of a tiered wall system where the combined height exceeds thresholds</li>
</ul>
<p>Tiered walls are a particularly common trap. Two 30-inch walls might each fall under the permit threshold individually, but if they're spaced less than the combined retained height apart horizontally, many jurisdictions treat them as a single wall system for permitting purposes.</p>
<h3>Soil Type and Drainage Considerations</h3>
<p>Some jurisdictions add permit requirements based on soil conditions, proximity to waterways, or flood zone designations. If a project is in or near a FEMA-designated flood zone, there may be additional requirements from the <a href="https://msc.fema.gov/portal/home" rel="nofollow noopener" target="_blank">FEMA Flood Map Service Center</a> that affect both the wall design and the permitting process.</p>
<hr>
<h2>How to Look Up Local Permit Requirements Without Wasting Hours</h2>
<p>Every project starts with a jurisdiction check. Here's a practical workflow that takes 15-30 minutes and gives you the information you need before you ever quote the job.</p>
<h3>Step 1: Identify the Correct Jurisdiction</h3>
<p>This sounds obvious, but it's easy to get wrong. A property might have a city address but fall under county jurisdiction for <a href="/construction-permit-site-plans">building permits</a>. Check whether the parcel is incorporated or unincorporated. The county assessor's website or a quick call to the local planning department can clarify this in minutes.</p>
<h3>Step 2: Search for Retaining Wall Permit Requirements Online</h3>
<p>Most municipalities now publish their permit requirements online. Search for:</p>
<ul>
<li>"[City/County name] retaining wall permit requirements"</li>
<li>"[City/County name] building permit handout retaining wall"</li>
<li>"[City/County name] residential grading permit"</li>
</ul>
<p>Many jurisdictions publish one-page handouts specifically for retaining walls that list height thresholds, required documents, fees, and inspection requirements.</p>
<h3>Step 3: Call the Building Department Directly</h3>
<p>For anything ambiguous, call. Building department staff field these questions constantly and are generally helpful. Prepare these specific questions:</p>
<ol>
<li>What is the height threshold that triggers a retaining wall permit?</li>
<li>How is height measured (top of wall to bottom of footing, or to existing grade)?</li>
<li>Are tiered wall systems evaluated as a single wall?</li>
<li>What documents are required for permit submission?</li>
<li>Is an engineered design required, and if so, at what height?</li>
<li>What is the current permit fee and typical review timeline?</li>
</ol>
<p>Write down the name of the person you spoke with and the date. If there's ever a dispute, that documentation protects you.</p>
<h3>Step 4: Document Your Findings for the Client</h3>
<p>Once you have the information, put it in writing to the client. A simple email summarizing what you found, what's required, and what the next steps are builds trust and creates a paper trail that protects both of you.</p>
<hr>
<h2>What Goes Into a Retaining Wall Site Plan</h2>
<p>This is where many landscapers get stuck. The permit application typically requires a site plan, and if you've never prepared one, the requirement feels like a roadblock. It doesn't have to be.</p>
<p>A retaining wall site plan is a scaled, overhead drawing of the property that shows the building department exactly where the wall is located and how it relates to everything around it. Here's what most jurisdictions require it to include:</p>
<h3>Property Boundaries and Dimensions</h3>
<p>The plan must show the full property boundary with accurate dimensions. This establishes legal context and allows the reviewer to verify setback compliance. Property survey data is the most reliable source for this information, though many jurisdictions accept dimensions pulled from county GIS records for residential projects.</p>
<h3>Existing Structures and Features</h3>
<p>The site plan should show:</p>
<ul>
<li>The primary dwelling footprint with dimensions</li>
<li>Accessory structures (garages, sheds, pools)</li>
<li>Existing hardscape (driveways, patios, walkways)</li>
<li>Significant trees if they affect the design</li>
<li>Utility easements</li>
</ul>
<h3>The Retaining Wall Location and Dimensions</h3>
<p>The wall itself needs to be clearly shown with:</p>
<ul>
<li>Its exact location relative to property lines (setback dimensions)</li>
<li>Overall length</li>
<li>Wall height at key points (especially where height is greatest)</li>
<li>Any steps or grade changes along the wall</li>
</ul>
<h3>Drainage and Grading Information</h3>
<p>Many jurisdictions require the plan to show how water will be managed. This includes:</p>
<ul>
<li>Existing and proposed grade elevations at key points</li>
<li>Drainage flow direction arrows</li>
<li>Any drainage structures (French drains, outlet pipes, catch basins)</li>
</ul>
<h3>North Arrow and Scale</h3>
<p>Every site plan needs a north arrow and a stated scale. Common scales for residential site plans are 1 inch = 10 feet or 1 inch = 20 feet, depending on lot size.</p>
<hr>
<h2>How to Prepare a Professional Site Plan Without Being a CAD Expert</h2>
<p>Here's the part that used to require hiring a drafting service or a civil engineer for a simple residential wall. Today, landscapers can produce permit-ready site plans themselves using browser-based tools designed exactly for this purpose.</p>
<p><a href="https://www.siteplancreator.com">Site Plan Creator</a> is built specifically for <a href="/contractors">contractors</a>, landscapers, and property owners who need professional, permit-ready site plans without the learning curve of traditional CAD software. You work directly in your browser, no downloads or licensing required, and the output is a scaled, professional drawing that meets the documentation standards most building departments require.</p>
<h3>What to Include in Your Site Plan Workflow</h3>
<p>Here's a practical workflow for preparing a retaining wall site plan:</p>
<ol>
<li><strong>Gather your source data.</strong> Pull the property boundary dimensions from the county assessor or GIS portal. Note the address and parcel number.</li>
<li><strong>Sketch the site in the field.</strong> During your site visit, measure the existing structures, note distances to property lines, and identify where the wall will run. Take photos from multiple angles.</li>
<li><strong>Build the site plan digitally.</strong> Using <a href="/">Site Plan Creator</a>, draw the property boundary to scale, place the existing structures, and add the proposed wall with accurate dimensions and setback callouts.</li>
<li><strong>Add drainage and grading notes.</strong> Even if the jurisdiction doesn't require detailed grading plans, showing drainage intent demonstrates competence and often speeds review.</li>
<li><strong>Export and submit.</strong> Most jurisdictions accept PDF submissions for residential permits. Export your plan at the required scale and attach it to the permit application.</li>
</ol>
<p>A well-prepared retaining wall site plan typically takes 1-2 hours to produce once you have your field measurements. That time investment is trivial compared to the cost of a delayed permit or a rejected application.</p>
<hr>
<h2>The Business Case for Handling Permits In-House</h2>
<p>Some landscapers still refer clients to a permit expediter or tell them to handle the permit themselves. That approach costs you money, control, and client confidence. Here's why bringing the permit process in-house is a competitive advantage.</p>
<h3>You Control the Timeline</h3>
<p>When you manage the permit, you control when it gets submitted and you stay informed about review status. You're not waiting on a client who forgot to mail the application or a third party who has fifteen other projects ahead of yours.</p>
<h3>You Protect Your Margin</h3>
<p>Permit expediters charge fees. When you can prepare the site plan and submit the application yourself, that service becomes a billable line item in your proposal rather than a cost you absorb or a task you outsource.</p>
<h3>You Build Client Trust</h3>
<p>Clients hire landscapers they trust to handle complexity. When you walk into a consultation and explain exactly what the permit process requires, how long it will take, and what it will cost, you position yourself as a professional rather than just a laborer. That's the difference between winning a $15,000 job and losing it to someone who quoted lower but left the permit question unanswered.</p>
<h3>You Reduce Liability</h3>
<p>An unpermitted retaining wall is a liability that follows the property. If a client sells their home and the wall shows up as unpermitted during inspection, you may be named in the dispute. Pulling the permit correctly the first time protects you legally and professionally.</p>
<hr>
<h2>Talking to Clients About Permits Without Losing the Sale</h2>
<p>The permit conversation is a sales conversation. How you frame it determines whether the client sees it as a problem or a professional service.</p>
<h3>Lead with Benefit, Not Bureaucracy</h3>
<p>Instead of saying "we're going to need a permit for this," try: "I'll handle the permit process for this project. That means the wall is fully documented, inspected, and on record with the city, which protects your property value and gives you peace of mind."</p>
<p>Same information, completely different framing.</p>
<h3>Be Specific About Cost and Timeline</h3>
<p>Vagueness kills deals. When you tell a client "permits can take a while," they imagine months of delay. When you say "the permit fee for this project is approximately $150, and the city's current review time is 10-15 business days," they have something concrete to plan around.</p>
<p>Call the building department before the proposal meeting. Get the actual fee schedule and current review times. Build those numbers into your proposal.</p>
<h3>Offer a Permit Management Package</h3>
<p>Consider adding a line item to your proposals called "Permit Management" that covers your time to prepare the site plan, complete the application, submit it, and coordinate inspections. Price it at $200-$500 depending on project complexity. Most clients will pay it without hesitation because it solves a problem they didn't want to deal with anyway.</p>
<hr>
<h2>Common Permit Mistakes Landscapers Make (and How to Avoid Them)</h2>
<p>Even experienced contractors make these errors. Knowing them in advance keeps your projects moving.</p>
<h3>Submitting an Incomplete Application</h3>
<p>Missing documents are the number one cause of permit delays. Before you submit, create a checklist based on the jurisdiction's requirements and verify every item is included. Common missing items include:</p>
<ul>
<li>Owner signature on the application</li>
<li>Contractor license number</li>
<li>Site plan at correct scale</li>
<li>Drainage plan or statement</li>
<li>Engineered drawings (when required)</li>
</ul>
<h3>Underestimating Wall Height</h3>
<p>As noted earlier, forgetting to measure from the bottom of the footing is a common error that leads to building without a required permit. Always measure total wall height including buried depth when determining whether a permit is needed.</p>
<h3>Not Accounting for Setback Requirements</h3>
<p>Retaining walls are often subject to <a href="/setback-guide">setback requirements</a> from property lines, easements, and structures. A wall that's designed right at the property line may need to be relocated once you review the actual setback rules. Discovering this after construction is expensive. Discovering it during the site plan phase costs nothing.</p>
<h3>Skipping the Final Inspection</h3>
<p>Some contractors pull the permit and then never schedule the final inspection, leaving the permit open. An open permit can cause problems during property sales and may result in fines. Schedule the inspection as soon as the work is complete and get the permit closed out properly.</p>
<hr>
<h2>When You Need an Engineer (and How to Handle It)</h2>
<p>For taller walls, certain soil conditions, or walls near structures, the building department may require a stamped engineered design. This is not the end of the world, but it does add cost and time to the project.</p>
<h3>Typical Engineering Thresholds</h3>
<p>Most jurisdictions require a licensed engineer's stamp for walls over 4 feet (from footing bottom to top). Some set the threshold at 6 feet. The engineering requirement should be confirmed during your jurisdiction research phase.</p>
<h3>How to Build Engineering Costs Into Your Proposal</h3>
<p>Get a relationship with a local civil or structural engineer who handles residential retaining wall designs. Many will provide a standard wall design for $300-$800 depending on complexity. Build that cost into your proposal as a pass-through with a small coordination fee.</p>
<p>Your site plan still plays a critical role even when engineering is required. The engineer needs your site plan to understand the site context, and the building department needs both documents together. A professional site plan that clearly shows property boundaries, setbacks, and the wall location makes the engineer's job easier and the permit reviewer's job faster.</p>
<h3>Resources for Finding Qualified Engineers</h3>
<p>The <a href="https://www.planning.org" rel="nofollow noopener" target="_blank">American Planning Association</a> and state licensing boards are good starting points for finding qualified professionals in your area. Your local building department can also often recommend engineers they've worked with on similar projects.</p>
<hr>
<h2>Building a Repeatable Permit Process for Your Business</h2>
<p>The landscapers who handle permits best aren't reinventing the wheel on every project. They have a system. Here's how to build one.</p>
<h3>Create a Jurisdiction Database</h3>
<p>For every city and county you regularly work in, maintain a simple document that records:</p>
<ul>
<li>Permit threshold height</li>
<li>How height is measured</li>
<li>Required documents</li>
<li>Current fees</li>
<li>Typical review times</li>
<li>Contact name at the building department</li>
<li>Date last verified</li>
</ul>
<p>Update it annually or whenever you notice requirements have changed. This database saves hours over the course of a busy season.</p>
<h3>Develop a Standard Site Plan Template</h3>
<p>Using Site Plan Creator, you can develop a standard template for your retaining wall site plans that includes your company logo, standard notes, a title block, and a north arrow. Each new project, you update the property-specific information rather than starting from scratch. A plan that used to take three hours now takes forty-five minutes.</p>
<h3>Build a Permit Checklist for Each Jurisdiction</h3>
<p>For your most common jurisdictions, create a permit submission checklist that lists every required document. Laminate it, keep it in your truck, and run through it before every submission.</p>
<h3>Track Permit Status Actively</h3>
<p>Don't submit and forget. Most building departments now have online portals where you can check permit status. Check weekly and follow up if a permit is sitting in review longer than the stated timeline. A polite phone call asking for a status update often moves things along.</p>
<hr>
<h2>Conclusion: Permits Are a Profit Center, Not a Problem</h2>
<p>Every landscaper who has lost a job because of permit complexity has also had a competitor who won that same job by making the permit process look easy. The difference isn't luck or connections. It's preparation, process, and professional presentation.</p>
<p>Retaining wall permits become manageable the moment you stop treating them as an obstacle and start treating them as a service you provide. You understand the local requirements. You prepare a professional retaining wall site plan. You handle the submission and coordinate the inspection. You deliver a completed, permitted, documented project that protects your client and your business.</p>
<p>The tools to do this professionally are more accessible than ever. Site Plan Creator gives landscapers and contractors the ability to produce permit-ready property site plans directly in a browser, with no CAD experience required. Whether you're documenting a simple 30-foot wall or a complex tiered system with drainage infrastructure, the platform is built to help you create the professional drawings that building departments expect.</p>
<p>Start your next retaining wall project with a plan that gets approved the first time. Visit <a href="https://www.siteplancreator.com">Site Plan Creator</a> to create your retaining wall site plan today.</p>