How Hardscape Contractors Use Site Plans to Avoid Permit Delays
Permit delays can derail a hardscape project before the first stone is laid. Discover how professional site plans help hardscape contractors win faster approvals, avoid costly rework, and build client trust on every patio, retaining wall, and impervious surface project.
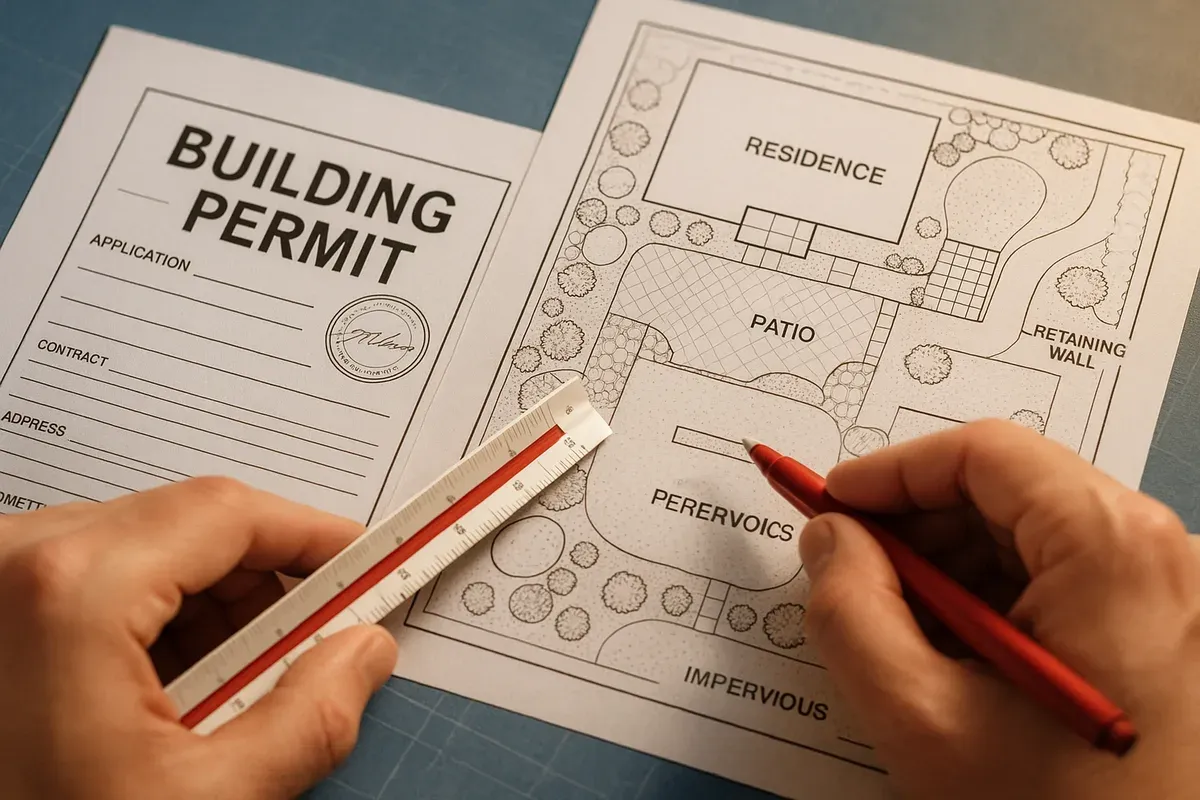
<h2>Why Permit Delays Are Killing Hardscape Project Timelines</h2>
<p>You've landed the job. The client is excited. Materials are on order. Then the permit office kicks back your application because the submitted drawings don't show setbacks, don't identify impervious surface calculations, or simply don't meet the municipality's minimum documentation standards. Now you're looking at a two-to-four week delay, a frustrated homeowner, and a crew with nothing to do.</p>
<p>This scenario plays out thousands of times every year across the country, and it is almost entirely preventable.</p>
<p>For hardscape <a href="/contractors">contractors</a> working on patios, <a href="/retaining-wall-site-plans">retaining walls</a>, driveways, pool decks, and outdoor living spaces, the permit process has grown more demanding in recent years. Municipalities are paying closer attention to stormwater runoff, impervious surface ratios, setback compliance, and structural integrity, especially as climate-related flooding events have prompted tighter local ordinances. In 2026, many jurisdictions that previously rubber-stamped basic hardscape permits are now requiring detailed, scaled site plans before they'll even open a review file.</p>
<p>The good news: contractors who understand how to produce a proper <strong>site plan</strong> as part of their standard workflow gain a serious competitive advantage. They submit complete applications, get faster approvals, avoid stop-work orders, and close more jobs because clients trust them to handle the process professionally.</p>
<p>This guide breaks down exactly what permit reviewers are looking for, why hardscape projects specifically trigger additional scrutiny, and how you can use a professional site plan to move through the permit pipeline with confidence.</p>
<hr>
<h2>What Permit Reviewers Actually Look For on Hardscape Applications</h2>
<p>Before you can produce a site plan that satisfies a permit reviewer, you need to understand what they're evaluating. Hardscape permit reviews typically focus on several distinct areas, and a missing element in any one of them is enough to generate a rejection or a request for additional information (RFI).</p>
<h3>Setback Compliance</h3>
<p>Every municipality sets minimum distances that structures must maintain from property lines, easements, right-of-ways, and sometimes neighboring structures. Patios, retaining walls, and driveways all qualify as structures in most zoning codes, which means they are subject to setback rules even if they're not enclosed buildings.</p>
<p>A permit reviewer cannot verify setback compliance without seeing:</p>
<ul>
<li>The location of all property lines with dimensions</li>
<li>The proposed location of the hardscape feature</li>
<li>A clear dimension showing the distance between the two</li>
</ul>
<p>If your application includes only a photo of the backyard or a rough sketch without measurements, the reviewer has no way to confirm compliance. The application gets rejected, and you start over.</p>
<h3>Impervious Surface Calculations</h3>
<p>This is the area where hardscape contractors face the most growing scrutiny in 2026. Impervious surfaces, including concrete, asphalt, pavers, compacted gravel, and even some permeable systems, affect how stormwater drains from a property. Most zoning codes cap the percentage of a lot that can be covered by impervious material.</p>
<p>Permit reviewers need to see:</p>
<ul>
<li>The total lot area</li>
<li>Existing impervious coverage (driveway, roof footprint, existing patio, etc.)</li>
<li>Proposed new impervious area</li>
<li>A combined total and percentage of lot coverage</li>
</ul>
<p>If a client's property is already near its impervious surface limit, adding a patio or expanding a driveway could push them over the threshold. A proper site plan that calculates and documents these numbers upfront prevents surprises and demonstrates that you've done your homework. The <a href="https://www.epa.gov/npdes/stormwater-discharges-construction-activities" rel="nofollow noopener" target="_blank">EPA's stormwater management resources</a> provide useful background on why municipalities enforce these limits so rigorously.</p>
<h3>Retaining Wall Height and Structural Notes</h3>
<p>Retaining walls receive their own layer of scrutiny because they are load-bearing structures. Most jurisdictions require a permit for any retaining wall over a certain height, commonly 24 to 48 inches depending on the municipality. Walls above a certain threshold (often 4 feet measured from the bottom of the footing) may require engineered drawings.</p>
<p>For permit purposes, a site plan for a retaining wall project should show:</p>
<ul>
<li>The wall's location relative to property lines and easements</li>
<li>The wall's length and proposed height</li>
<li>Notation of any surcharge loads (driveways or structures above the wall)</li>
<li>Drainage provisions behind the wall</li>
</ul>
<h3>Grading and Drainage Direction</h3>
<p>Even on projects that don't involve a full retaining wall, permit reviewers want to confirm that proposed hardscape won't redirect stormwater onto neighboring properties or into structures. A site plan that includes basic grading arrows or slope notation shows that you've considered drainage, which can make the difference between a smooth approval and a request for additional engineering documentation.</p>
<hr>
<h2>The Real Cost of an Incomplete Permit Application</h2>
<p>Contractors sometimes view permit documentation as a bureaucratic formality rather than a project management tool. That perspective gets expensive fast. Here's what an incomplete or rejected permit application actually costs:</p>
<ol>
<li><strong>Scheduling disruption.</strong> A two-week permit delay in peak season can cascade into a four-to-six week project shift when you account for rescheduling crews and material deliveries.</li>
<li><strong>Material holding costs.</strong> If materials are staged and a stop-work order arrives, you're paying for storage or leaving product exposed to weather.</li>
<li><strong>Client relationship damage.</strong> <a href="/homeowners">Homeowners</a> who expected a project to start on a specific date don't easily forgive unexplained delays. Referrals and reviews suffer.</li>
<li><strong>Resubmission fees.</strong> Many municipalities charge a resubmission fee when an application is rejected and resubmitted. These fees are rarely significant on their own, but they add up across a busy season.</li>
<li><strong>Stop-work orders on unpermitted work.</strong> If a contractor proceeds without a permit and a neighbor or inspector flags the project, the resulting stop-work order can require demolition and rebuilding of completed work. This is the worst-case scenario and it happens more than most contractors want to admit.</li>
</ol>
<p>A professional site plan that satisfies the permit reviewer's checklist on the first submission eliminates most of these risks entirely.</p>
<hr>
<h2>What a Permit-Ready Hardscape Site Plan Includes</h2>
<p>A <strong>patio permit site plan</strong> or retaining wall permit drawing doesn't need to be an architectural masterpiece. It needs to be accurate, clearly labeled, drawn to scale, and include all the information the reviewing jurisdiction requires. Here's a breakdown of the standard components.</p>
<h3>Property Boundary and Dimensions</h3>
<p>The site plan must show the full property outline with dimensions on all sides. This information typically comes from a recorded survey, a plat map, or the county assessor's records. Even if the client doesn't have a recent survey on file, plat maps are often available through the county recorder's office or GIS portal.</p>
<p>The property boundary is the foundation of the entire site plan. Every other measurement, including setbacks and coverage calculations, references back to it.</p>
<h3>Existing Structures and Features</h3>
<p>Before adding the proposed hardscape, the site plan should document what already exists on the property:</p>
<ul>
<li>The primary residence with its footprint dimensions</li>
<li>Existing driveways, walkways, and patios</li>
<li>Accessory structures (garages, sheds, pool equipment pads)</li>
<li>Utilities, easements, and right-of-ways</li>
<li>Trees or significant landscaping if relevant to the project</li>
</ul>
<p>This baseline documentation serves two purposes. It gives the permit reviewer a complete picture of the property, and it establishes the existing impervious surface area from which new coverage will be calculated.</p>
<h3>Proposed Hardscape with Dimensions</h3>
<p>The proposed work should be clearly differentiated from existing conditions, typically using a different line weight, pattern, or notation. The site plan should show:</p>
<ul>
<li>The exact location of the proposed patio, wall, driveway, or other feature</li>
<li>Dimensions of the proposed feature (length, width, area in square feet)</li>
<li>Setback dimensions from property lines and easements</li>
<li>Any grading changes or drainage features</li>
</ul>
<h3>North Arrow and Scale</h3>
<p>Every permit-ready site plan needs a north arrow and a stated scale. These two elements allow the reviewer to orient the drawing relative to the property and verify that dimensions are proportionally accurate. A drawing without a scale is essentially unverifiable and will almost always trigger a rejection.</p>
<h3>Title Block and Project Information</h3>
<p>A proper title block should include:</p>
<ul>
<li>Property address</li>
<li>Owner name</li>
<li>Contractor name and license number</li>
<li>Date of preparation</li>
<li>Revision history if applicable</li>
<li>Sheet number and total sheet count</li>
</ul>
<p>This information seems basic, but missing title block data is a surprisingly common reason for permit rejections, particularly for contractors who submit hand-sketched drawings without formal documentation.</p>
<hr>
<h2>How Different Hardscape Project Types Trigger Different Permit Requirements</h2>
<p>Not every hardscape project has the same permit pathway. Understanding which projects trigger which requirements helps you prepare the right documentation from the start.</p>
<h3>Patio Permits</h3>
<p>A ground-level patio permit is often the most straightforward hardscape permit, but it's not without complexity. Key triggers for additional review include:</p>
<ul>
<li>Patios that exceed a certain square footage (commonly 200 to 500 square feet depending on the jurisdiction)</li>
<li>Patios that push the property over its impervious surface limit</li>
<li>Patios within setback zones</li>
<li>Patios attached to the primary structure (which may trigger <a href="/construction-permit-site-plans">building permit</a> requirements rather than just zoning review)</li>
</ul>
<p>For a patio permit site plan, your documentation should prioritize setback dimensions and impervious surface calculations above all else.</p>
<h3>Retaining Wall Permits</h3>
<p>The <strong>retaining wall permit</strong> process is typically the most documentation-intensive hardscape permit type. Beyond the standard site plan elements, walls above a certain height require:</p>
<ul>
<li>Cross-section drawings showing wall construction details</li>
<li>Footing depth and dimensions</li>
<li>Drainage provisions (gravel backfill, perforated pipe, weep holes)</li>
<li>Engineering calculations for walls above 4 feet in most jurisdictions</li>
</ul>
<p>The <a href="https://www.iccsafe.org/products-and-events/i-codes/" rel="nofollow noopener" target="_blank">International Building Code (IBC)</a>, maintained by the International Code Council, provides the baseline structural requirements that most local jurisdictions adopt and modify. Familiarizing yourself with IBC Section 1807 on foundation walls and retaining walls gives you a strong foundation for understanding what engineers and reviewers are evaluating.</p>
<h3>Driveway and Impervious Surface Expansions</h3>
<p>Driveway expansions are among the most commonly flagged hardscape projects in jurisdictions with impervious surface caps. A homeowner who wants to widen their driveway by four feet may not realize they're about to trigger a stormwater management review.</p>
<p>As an <strong>impervious surface contractor</strong>, your value to the client increases dramatically when you can walk them through the math before the permit application is submitted. A site plan that clearly shows existing coverage, proposed coverage, and the resulting percentage of lot coverage demonstrates professionalism and prevents the kind of surprise rejections that damage client relationships.</p>
<p>Some jurisdictions offer credits or allowances for permeable paver systems, which can be a valuable selling point when a client is near their impervious limit. Documenting the permeable system in the site plan and noting the applicable credit in the permit application can open the door to projects that would otherwise be denied.</p>
<h3>Outdoor Living Structures</h3>
<p>Pergolas, covered patios, outdoor kitchens, and fire pit areas often sit at the intersection of hardscape and structure permits. If a roof element is involved, most jurisdictions treat the project as a building permit rather than a simple zoning or grading permit. Understanding this distinction early saves significant time.</p>
<hr>
<h2>Building a Site Plan Workflow That Scales With Your Business</h2>
<p>For a solo contractor or a small crew, producing a site plan for every project might feel like overkill. But the contractors who build this habit early find that it becomes a competitive advantage as their business grows. Here's how to build a site plan workflow that doesn't slow you down.</p>
<h3>Step 1: Gather Property Information at the Estimate Stage</h3>
<p>Don't wait until a job is sold to start gathering property data. During your initial site visit and estimate, collect:</p>
<ul>
<li>The property address (for pulling plat maps and GIS data)</li>
<li>Approximate lot dimensions</li>
<li>Existing impervious surface features</li>
<li>Any visible easements or utility markings</li>
</ul>
<p>Having this information before the contract is signed means you can include a realistic permit timeline in your proposal rather than treating permitting as an afterthought.</p>
<h3>Step 2: Pull the Plat Map and Zoning Information</h3>
<p>Most county recorder and assessor offices make plat maps available online at no cost. The plat map gives you the recorded property dimensions, easements, and lot layout. Cross-reference this with the local zoning code to identify:</p>
<ul>
<li>Required setbacks for structures</li>
<li>Maximum impervious surface percentage</li>
<li>Any overlay districts (flood zones, historic districts, steep slope zones) that add requirements</li>
</ul>
<p>The <a href="https://www.planning.org/" rel="nofollow noopener" target="_blank">American Planning Association</a> maintains resources on zoning best practices that can help you understand how local codes are structured and where to find the information you need.</p>
<h3>Step 3: Build the Site Plan in a Browser-Based Tool</h3>
<p>This is where using the right software makes a significant difference. Browser-based CAD tools designed specifically for site plans allow you to:</p>
<ul>
<li>Import property dimensions and lay out the boundary accurately</li>
<li>Place existing structures and features to scale</li>
<li>Add proposed hardscape elements with dimensions</li>
<li>Calculate areas automatically for impervious surface math</li>
<li>Generate a clean, professional PDF output that meets permit submission standards</li>
</ul>
<p><a href="/">Site Plan Creator</a> is built specifically for this workflow. You don't need AutoCAD experience or a drafting background to produce a permit-ready site plan. The tool handles the technical drawing requirements so you can focus on the project itself.</p>
<h3>Step 4: Review Against the Local Permit Checklist</h3>
<p>Most permit offices publish a checklist of what must be included in a site plan submission. Before you finalize your drawing, run through that checklist line by line. Common items include:</p>
<ul>
<li>Scaled drawing with stated scale</li>
<li>North arrow</li>
<li>Property dimensions and boundary</li>
<li>Setback dimensions labeled</li>
<li>Existing and proposed impervious surface areas</li>
<li>Project address and owner information</li>
<li>Contractor license number</li>
</ul>
<h3>Step 5: Submit Digitally Where Possible</h3>
<p>An increasing number of municipalities now accept or require digital permit submissions. A browser-based site plan tool that exports a clean, high-resolution PDF is ideal for digital submission workflows. Check whether your local permit office uses an online portal, as digital submissions often move through the review queue faster than paper applications.</p>
<hr>
<h2>How Site Plans Help You Win More Hardscape Jobs</h2>
<p>Beyond permit compliance, a professional site plan is a powerful sales tool. When you show a prospective client a scaled drawing of their proposed patio or retaining wall, you accomplish several things simultaneously:</p>
<ul>
<li>You demonstrate technical competence that most competitors don't show at the estimate stage</li>
<li>You give the client a visual representation of the project that helps them commit with confidence</li>
<li>You establish the scope of work in a documented, visual format that reduces scope creep disputes</li>
<li>You signal that you handle permits professionally, which is a major concern for homeowners who've heard horror stories about unpermitted work</li>
</ul>
<p>Contractors who present site plans during the sales process consistently report higher close rates, particularly on larger projects where homeowners are more cautious about choosing the right contractor.</p>
<p>Presenting a site plan also gives you a natural opportunity to discuss the permit process, timeline, and any potential complications before they become problems. That transparency builds trust and positions you as the professional in the room.</p>
<hr>
<h2>Common Mistakes Hardscape Contractors Make on Permit Applications</h2>
<p>Even experienced contractors make avoidable mistakes on permit applications. Here are the most common ones and how to sidestep them:</p>
<ul>
<li><strong>Submitting drawings without a stated scale.</strong> Always include a graphic scale bar and a written scale (e.g., 1 inch = 10 feet).</li>
<li><strong>Forgetting to show existing impervious surfaces.</strong> Permit reviewers need the full picture, not just the proposed addition.</li>
<li><strong>Using lot size from the listing rather than the plat.</strong> Tax records and <a href="/real-estate">real estate</a> listings sometimes use rounded or estimated lot areas. Always pull the recorded plat.</li>
<li><strong>Omitting easements.</strong> Utility easements, drainage easements, and access easements all affect where structures can be placed. Missing them is a fast path to rejection.</li>
<li><strong>Not labeling setback dimensions.</strong> Showing the setback graphically isn't enough. Label the dimension clearly so the reviewer doesn't have to measure it themselves.</li>
<li><strong>Skipping the title block.</strong> Project address, owner name, contractor license number, and date are non-negotiable in most jurisdictions.</li>
<li><strong>Treating all municipalities the same.</strong> Permit requirements vary significantly from one jurisdiction to the next. Always pull the local checklist rather than assuming requirements are universal.</li>
</ul>
<hr>
<h2>Conclusion: Make Site Plans Part of Every Hardscape Project</h2>
<p>The hardscape contractors who thrive in 2026 are the ones who treat permit documentation as a professional standard rather than a burden. A well-prepared site plan is not just a permit requirement; it is a project management tool, a sales asset, and a risk management strategy all in one document.</p>
<p>When you submit a complete, accurate, permit-ready site plan on the first attempt, you avoid the delays, fees, and client frustration that come from rejected applications. You move projects forward on schedule, protect your reputation, and demonstrate the kind of professionalism that generates referrals and repeat business.</p>
<p>Site Plan Creator makes it straightforward to produce professional, permit-ready site plans directly in your browser, without expensive CAD software or a drafting background. Whether you're pulling a patio permit, navigating a retaining wall permit, or calculating impervious surface coverage for a driveway expansion, the platform gives you the tools to get it right the first time.</p>
<p>Start your next hardscape project with a site plan that works as hard as you do. Visit <a href="https://www.siteplancreator.com">siteplancreator.com</a> to create your first permit-ready drawing today.</p>