DIY Site Plan for a Fence Permit: Step-by-Step Guide
Getting a fence permit doesn't have to mean hiring an expensive surveyor or architect. This step-by-step guide walks homeowners through creating a professional DIY site plan for a fence permit, covering everything from reading your property survey to submitting a permit-ready drawing.
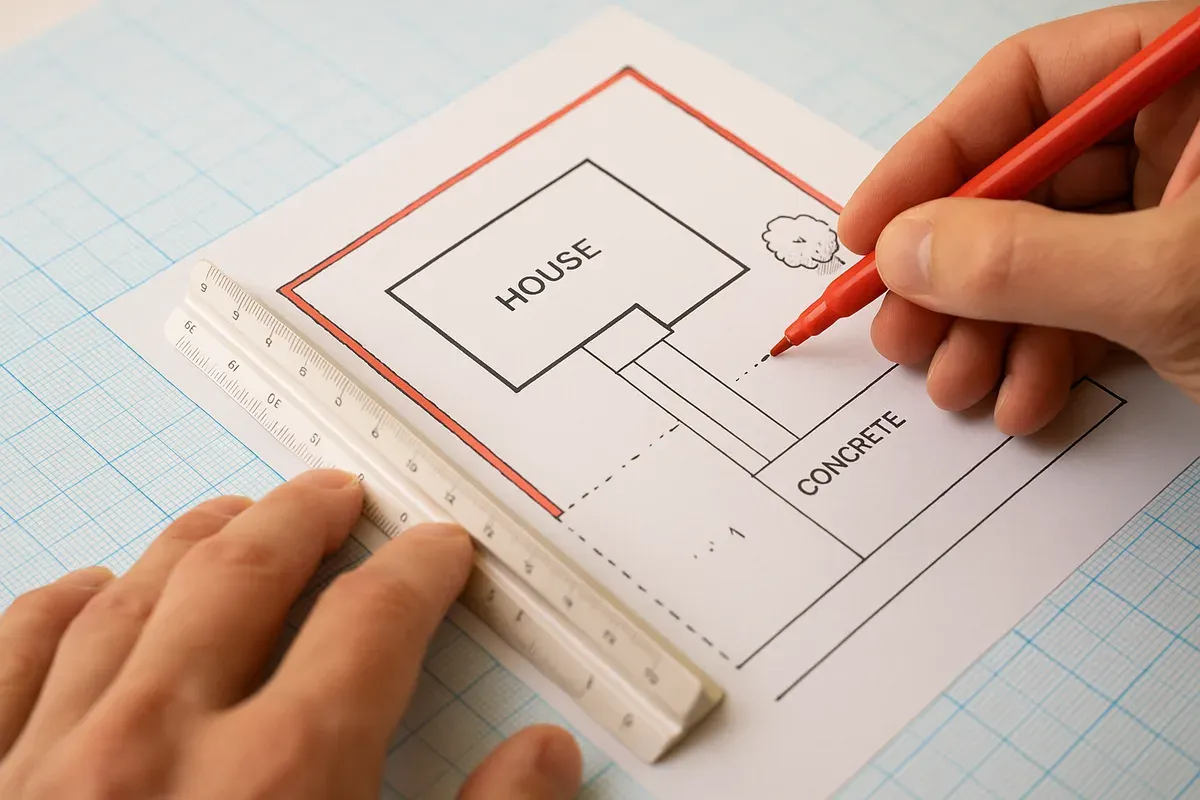
<p>Putting up a new fence is one of the most satisfying home improvement projects a homeowner can tackle. It adds privacy, defines your property, keeps pets and kids safe, and can genuinely boost curb appeal. But before a single post goes in the ground, most municipalities require you to pull a <a href="/fence-deck-site-plans">fence permit</a>, and that permit almost always requires a site plan.</p>
<p>For many <a href="/homeowners">homeowners</a>, that requirement triggers immediate anxiety. Words like "site plan," "property boundaries," and "<a href="/setback-guide">setback requirements</a>" can make the whole process feel like it belongs in the hands of a professional. The truth is, a fence permit site plan is one of the most approachable documents a homeowner can create on their own. You don't need a surveyor, an architect, or expensive CAD software. You need accurate information about your property, a clear understanding of your local rules, and the right tools to put it all on paper.</p>
<p>This guide walks you through the entire process, from gathering your source documents to submitting a permit-ready drawing, so you can get your fence approved and get to work.</p>
<h2>Why Fence Permits Require a Site Plan</h2>
<p>Before diving into the how-to, it helps to understand why permit offices ask for a site plan in the first place. A site plan gives the reviewer a bird's-eye view of your property that answers three essential questions:</p>
<ol>
<li><strong>Where is the fence going?</strong> The reviewer needs to see the proposed fence line in relation to your property boundaries.</li>
<li><strong>Does it meet setback requirements?</strong> Most zoning codes require fences to be set back a minimum distance from property lines, sidewalks, or road rights-of-way.</li>
<li><strong>Does it avoid utility easements and other restrictions?</strong> Underground utilities, drainage easements, and deed restrictions can all affect where a fence can legally go.</li>
</ol>
<p>Without a site plan, a permit reviewer has no way to confirm that your project meets local code. A well-drawn site plan speeds up the review process, reduces the chance of rejection, and protects you from costly mistakes like accidentally building on a neighbor's property or over a buried gas line.</p>
<p>For a broader overview of what building departments typically look for in permit applications, the <a href="https://www.iccsafe.org" rel="nofollow noopener" target="_blank">International Code Council (ICC)</a> publishes model building and zoning codes that many municipalities adopt as their baseline standards.</p>
<h2>Step 1: Gather Your Property Documents</h2>
<p>Every accurate site plan starts with accurate source information. Before you open any drawing tool, collect the following documents.</p>
<h3>Your Property Survey or Plat Map</h3>
<p>This is the most important document you'll use. A property survey (sometimes called a plat map or survey plat) shows your lot's exact dimensions, the location of property corners, and any recorded easements. You may have received one when you purchased your home.</p>
<p>If you don't have a copy, here's where to look:</p>
<ul>
<li><strong>County recorder or assessor's office:</strong> Most plat maps are recorded public documents available online or at the county office.</li>
<li><strong>Title company:</strong> If you used a title company when you bought your home, they likely have a copy of the survey on file.</li>
<li><strong>Your mortgage closing documents:</strong> Surveys are often included in closing packages.</li>
<li><strong>Your local GIS portal:</strong> Many counties maintain online GIS (Geographic Information System) mapping tools that show parcel boundaries, dimensions, and sometimes easements.</li>
</ul>
<p>If you genuinely cannot locate a survey and your lot dimensions are unclear, hiring a licensed surveyor to locate and flag your property corners before you start drawing is money well spent. Building a fence in the wrong location is far more expensive to fix.</p>
<h3>Zoning and Land Use Information</h3>
<p>Contact your local planning or zoning department (or check their website) to find out:</p>
<ul>
<li>Maximum fence height allowed in your zone, often different for front yards versus rear yards</li>
<li>Required setbacks from property lines, sidewalks, and road rights-of-way</li>
<li>Any restrictions on fence materials or opacity</li>
<li>Whether your property is in a historic district or HOA with additional design requirements</li>
</ul>
<p>The <a href="https://www.planning.org" rel="nofollow noopener" target="_blank">American Planning Association</a> maintains resources on how local zoning codes work, which can help you understand the terminology you'll encounter when reading your municipality's fence regulations.</p>
<h3>Utility Easement Information</h3>
<p>Call 811 (the national "Call Before You Dig" number in the United States) before any fence installation, but also before you finalize your site plan. Knowing where underground utilities run helps you plan post locations accurately and flag any conflicts your permit reviewer will need to see addressed.</p>
<p>Easements are also typically shown on your survey plat. Common types include:</p>
<ul>
<li>Utility easements (for underground lines)</li>
<li>Drainage easements</li>
<li>Access easements shared with neighbors</li>
</ul>
<p>Fences are sometimes prohibited entirely within certain easement widths, or they may need to be designed so utility crews can access the area.</p>
<h2>Step 2: Understand What Your Site Plan Must Show</h2>
<p>Different municipalities have slightly different requirements, so always check your local permit office's checklist first. That said, a fence permit site plan almost universally needs to include:</p>
<h3>Required Site Plan Elements</h3>
<ul>
<li><strong>North arrow:</strong> Orients the reviewer to the drawing.</li>
<li><strong>Scale indicator:</strong> Either a written scale (e.g., 1 inch = 20 feet) or a graphic scale bar.</li>
<li><strong>Property boundaries:</strong> All four sides of your lot with dimensions labeled.</li>
<li><strong>Existing structures:</strong> Your house footprint, detached garage, sheds, and any other permanent structures.</li>
<li><strong>Proposed fence line:</strong> Clearly drawn and labeled, showing where the fence will run.</li>
<li><strong>Setback dimensions:</strong> The measured distance from your fence to the property line (or road right-of-way) at critical points.</li>
<li><strong>Easement locations:</strong> Any recorded easements shown and labeled.</li>
<li><strong>Street names:</strong> Label the street(s) your property fronts.</li>
<li><strong>Lot address:</strong> Your property address on the drawing.</li>
<li><strong>Driveway and gate locations:</strong> If your fence includes a gate, show its location and swing direction.</li>
</ul>
<p>Some municipalities also ask for a fence detail showing the proposed height, material, and construction method. This is often a simple cross-section sketch that can be placed in a corner of the same sheet.</p>
<h2>Step 3: Choose Your Drawing Method</h2>
<p>Homeowners have several options for creating a fence permit site plan, ranging from pencil and graph paper to professional online tools. Here's an honest look at each.</p>
<h3>Hand Drawing on Graph Paper</h3>
<p>For simple rectangular lots with straightforward fence runs, a hand-drawn plan on graph paper can work. Use a ruler, assign each square a consistent unit (such as 1 square = 5 feet), and draw carefully. The major drawbacks are that hand drawings are harder to revise, harder to scale accurately, and can look unprofessional to permit reviewers who see hundreds of plans per week.</p>
<h3>General-Purpose Drawing Software</h3>
<p>Tools like Microsoft Visio or even Google Slides can be used to create basic diagrams, but they aren't designed for scaled property drawings. Maintaining accurate scale requires significant manual effort, and these tools lack the property-specific features that make permit drawings clear and credible.</p>
<h3>Browser-Based CAD-Style Tools</h3>
<p>This is where homeowners get the best combination of accuracy, ease of use, and professional output. Tools like <strong><a href="/">Site Plan Creator</a></strong> are purpose-built for exactly this kind of permit drawing. You can:</p>
<ul>
<li>Draw your lot to scale using real dimensions from your survey</li>
<li>Place building footprints, driveways, and other existing features</li>
<li>Draw and label your proposed fence line</li>
<li>Add setback dimensions and annotations</li>
<li>Export a clean, permit-ready PDF</li>
</ul>
<p>Using a purpose-built tool eliminates the most common mistakes homeowners make when drawing by hand, including inconsistent scale, missing labels, and unclear line weights.</p>
<h2>Step 4: Draw Your Property Boundaries</h2>
<p>With your survey in hand and your drawing tool ready, start with the foundation of every site plan: the property boundaries.</p>
<h3>Setting Your Scale</h3>
<p>Choose a scale that fits your entire lot on a single sheet while still being legible. Common scales for residential lots include:</p>
<ul>
<li>1 inch = 10 feet (good for small urban lots)</li>
<li>1 inch = 20 feet (most common for typical suburban lots)</li>
<li>1 inch = 30 feet or 1 inch = 40 feet (for larger rural properties)</li>
</ul>
<p>If you're using a browser-based tool like Site Plan Creator, you can input real-world dimensions directly and let the software handle the scaling automatically.</p>
<h3>Drawing the Lot Lines</h3>
<p>Using the dimensions from your survey plat, draw each property line in order. Label each line with its length in feet. If your lot has irregular angles or curves (common in cul-de-sac lots or older subdivisions), note those carefully.</p>
<p>Mark the location of your property corners. These are the reference points from which all other measurements on your plan should originate.</p>
<h3>Adding the Street and North Arrow</h3>
<p>Label the street your property fronts. If you have a corner lot, label both streets. Add a north arrow, typically pointing toward the top of the page, though this can vary based on lot orientation.</p>
<h2>Step 5: Add Existing Structures and Features</h2>
<p>Once your lot outline is complete, add everything that already exists on the property. This context helps the permit reviewer understand the full picture.</p>
<h3>What to Include</h3>
<ul>
<li><strong>House footprint:</strong> Draw the outline of your home's foundation, including any attached garage, covered porch, or addition. Label it "Existing House" or "Existing Dwelling."</li>
<li><strong>Detached structures:</strong> Sheds, detached garages, pool houses, and similar structures should all be shown.</li>
<li><strong>Driveway and walkways:</strong> Show the driveway as it connects from the street to the garage or parking area.</li>
<li><strong><a href="/pool-site-plans">Swimming pool</a> or spa:</strong> If you have one, include it. Pools often trigger additional fencing requirements (most jurisdictions require a barrier fence around pools), so showing it is important.</li>
<li><strong>Existing fencing:</strong> If any fence already exists on the property, show it and label it "Existing Fence."</li>
<li><strong>Trees and landscaping:</strong> You don't need to show every shrub, but large trees near the fence line are worth noting, especially if their root systems or canopy might affect fence installation.</li>
</ul>
<h3>Measuring from Your House</h3>
<p>If you don't have a survey that shows your house's exact position on the lot, you can measure from your property corners to your house corners using a tape measure. Take measurements from at least two property corners to establish the house's position accurately. Write these measurements down and use them to place the house footprint on your drawing.</p>
<h2>Step 6: Draw the Proposed Fence Line</h2>
<p>Now comes the central element of your fence permit site plan: the proposed fence itself.</p>
<h3>Mapping the Fence Route</h3>
<p>Using a different line style than your property boundaries (a dashed line or a heavier solid line works well), draw the route your fence will follow. Be specific. If the fence runs along the rear property line, draw it along that line. If it steps in from the property line to meet a setback requirement, show that offset with a dimension.</p>
<p>Common fence configurations include:</p>
<ul>
<li><strong>Full perimeter fence:</strong> Runs along all four property lines, typically with a gate at the driveway.</li>
<li><strong>Rear and side yard only:</strong> Common when front yard fence height is restricted or prohibited.</li>
<li><strong>Partial fence:</strong> Encloses just a portion of the yard, such as a pool area or dog run.</li>
</ul>
<h3>Showing Setbacks</h3>
<p>This is one of the most important parts of your drawing. For each section of fence that runs near a property line, street right-of-way, or other regulated boundary, add a dimension showing the distance between the fence and that boundary.</p>
<p>For example, if your zoning code requires a 2-foot setback from the side property line and your fence is positioned 2 feet inside the line, draw a small dimension line showing "2 ft" between the fence and the property line at that location.</p>
<p>If your fence runs directly on the property line (which is allowed in many jurisdictions for rear and side yards), label it clearly as "On Property Line" so the reviewer doesn't have to guess.</p>
<h3>Marking Gates</h3>
<p>Show every gate location with a break in the fence line and a label. For swing gates, indicate the swing direction with a small arc. For sliding gates, indicate the direction they slide. If you're installing a driveway gate, note its width.</p>
<h3>Labeling Fence Height and Material</h3>
<p>Add a note on the drawing (or in a legend) indicating:</p>
<ul>
<li>Proposed fence height (e.g., "6-ft privacy fence")</li>
<li>Fence material (e.g., cedar wood, vinyl, chain link, aluminum)</li>
<li>If fence height varies by section (e.g., 4 ft in front yard, 6 ft in rear), label each section separately</li>
</ul>
<h2>Step 7: Add Easements and Utility Information</h2>
<p>Return to your survey plat and identify any recorded easements. Draw these on your site plan using a distinct line style or shading, and label each one (e.g., "10-ft Utility Easement," "Drainage Easement").</p>
<p>If your proposed fence runs through or near an easement, add a note explaining how you plan to handle it. In many cases, fences are allowed within easements as long as they don't permanently obstruct access. Your permit reviewer will want to see that you've considered this.</p>
<p>For properties in flood-prone areas, check <a href="https://msc.fema.gov/portal/home" rel="nofollow noopener" target="_blank">FEMA's Flood Map Service Center</a> to determine if your lot is in a Special Flood Hazard Area. Fences in floodplains sometimes require additional review or engineering to ensure they don't obstruct flood flow.</p>
<h2>Step 8: Add Final Annotations and Review Your Drawing</h2>
<p>With the main elements in place, add the finishing touches that make your drawing complete and professional.</p>
<h3>Title Block Information</h3>
<p>In a corner of your drawing (typically the bottom right), include:</p>
<ul>
<li>Property address</li>
<li>Owner name</li>
<li>Date of drawing</li>
<li>Scale</li>
<li>A brief project description (e.g., "Proposed Privacy Fence, Rear and Side Yards")</li>
<li>Your name and contact information as the applicant</li>
</ul>
<h3>Double-Check These Common Mistakes</h3>
<p>Before exporting or printing your plan, review it against this checklist:</p>
<ol>
<li>Are all property line dimensions labeled?</li>
<li>Is the north arrow present and oriented correctly?</li>
<li>Is the scale clearly indicated?</li>
<li>Is the proposed fence line clearly distinguishable from property lines and existing structures?</li>
<li>Are all setback dimensions shown?</li>
<li>Are easements labeled?</li>
<li>Are gate locations marked?</li>
<li>Is the fence height and material noted?</li>
<li>Is the property address on the drawing?</li>
<li>Does the drawing match your local permit office's specific checklist?</li>
</ol>
<h3>Get a Second Set of Eyes</h3>
<p>Before you submit, ask a neighbor or family member to look at your drawing and tell you what they understand from it. If they can accurately describe where the fence will go and how far it is from the property lines, your drawing is communicating effectively. If they're confused, revise before submitting.</p>
<h2>Step 9: Submit Your Permit Application</h2>
<p>With your site plan complete, you're ready to submit. Most municipalities accept fence permit applications either in person at the permit office or through an online portal.</p>
<h3>What to Bring or Upload</h3>
<ul>
<li>Completed permit application form (available from your local building or zoning department)</li>
<li>Your site plan (printed to scale or as a PDF, depending on submission method)</li>
<li>Any required fence detail drawings showing height and construction</li>
<li>Permit fee payment</li>
<li>HOA approval letter, if applicable</li>
</ul>
<h3>Typical Review Timelines</h3>
<p>Fence permits are generally among the fastest permits to get approved. Many jurisdictions review them within a few business days to two weeks. If your municipality offers over-the-counter review (meaning a staff member reviews it while you wait), a clear, well-prepared site plan dramatically increases your chances of same-day approval.</p>
<h3>Responding to Revision Requests</h3>
<p>If the permit office requests changes to your site plan, don't be discouraged. Common revision requests include:</p>
<ul>
<li>Adding a missing dimension</li>
<li>Clarifying the fence line in a specific area</li>
<li>Providing additional setback information near a corner</li>
</ul>
<p>Because you created the drawing yourself in a browser-based tool, making revisions is straightforward. Update the file, export a new PDF, and resubmit.</p>
<h2>Tips for a Smooth Fence Permit Process</h2>
<p>Beyond the technical drawing steps, a few practical habits make the entire permit process easier.</p>
<ul>
<li><strong>Talk to your neighbors first.</strong> If your fence runs along a shared property line, a quick conversation with your neighbor before you submit can prevent disputes later. Some jurisdictions even require neighbor notification.</li>
<li><strong>Photograph your property corners.</strong> If a surveyor has previously flagged your corners with stakes or pins, photograph them before you start your project. This protects you if a question arises about fence placement later.</li>
<li><strong>Keep a copy of your approved permit on site.</strong> Once your permit is approved, keep a copy available during installation. Inspectors sometimes do spot checks on fence projects.</li>
<li><strong>Schedule any required inspections.</strong> Some municipalities require a post-hole inspection before you pour concrete, and a final inspection once the fence is complete. Check your permit conditions carefully.</li>
<li><strong>Don't start work before approval.</strong> It can be tempting to get started while waiting for your permit, but building without approval can result in fines, stop-work orders, and even mandatory fence removal.</li>
</ul>
<h2>Conclusion</h2>
<p>Creating a DIY site plan for a fence permit is a genuinely achievable project for any homeowner willing to gather the right information and take a methodical approach. The process comes down to understanding your property boundaries, knowing your local zoning requirements, and translating that information into a clear, scaled drawing that gives your permit reviewer everything they need to say yes.</p>
<p>The biggest obstacle most homeowners face isn't technical knowledge. It's uncertainty about where to start. By following the steps in this guide, you have a clear roadmap from your first document search to your final permit submission.</p>
<p>When you're ready to create your drawing, <strong>Site Plan Creator</strong> makes the process faster and more accurate than any hand-drawn method. Our browser-based tool is purpose-built for exactly this kind of residential permit drawing. You can draw your lot to scale, place existing structures, map your proposed fence line, add setback dimensions, and export a professional PDF that meets permit office standards, all without downloading software or hiring a design professional. Visit <a href="https://www.siteplancreator.com">siteplancreator.com</a> to start your fence permit site plan today.</p>